Learn how to import ICM text files with only a field separator
As today’s tutorial shows, you can easily customize STAEDEAN Connectivity Studio for Microsoft Dynamics AX without changing our standard code. We are going to work through importing text files in ICM format with only a field separator.
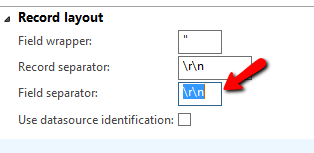
Sometimes requests for ICM files are not easy to follow in setup, because the format has some limitations: It has only a field separator and no record separator. Normally, there is a line with multiple fields:
The ICM format is different. It contains one field per line. The field separator is a carriage return and linefeed.
There are some restrictions to the ICM format:
We overcome these as follows.
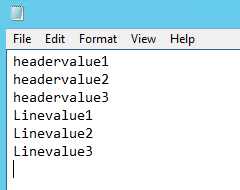
First define the test file and save it in a folder which can be accessed by a Connectivity Studio AOS user.
This format is not supported out-of-the-box. Therefore, we need some code additions that do not change the class in Connectivity Studio, but create a new one to be used. This also avoids future upgrade problems. The idea is to set up a document with only two records, one for the header and one for the lines. The steps are as follows:
The form will look like the screen image below.
The problem is that you need to read the files differently. Now Connectivity Studio should read the first 3 fields and use that as header. Field 4, 5, and 6 are the first line, the next 3 fields are the second line and so on. That means that the way Connectivity Studio reads the fields should be changed. To accomplish this, you need to extend the base class for text files.
An XPO file is attached. It contains the class, which is described and which can be imported into the target environment. This is what the XPO file prompts Connectivity Studio to do:
You can download the XPO file from Class_TstDocumentTextICM.xpo. After the download, you can import the XPO file into your development environment and select it as a custom handler in your document.
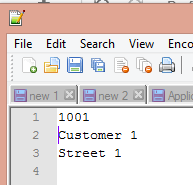
Now you're ready to run a test for the file. In the development pane, you can select the test option where you can specify a folder connection and a link to your file name. After running the test, you should see a result like illustrated below.
Thanks for following along! I hope this tutorial helped you work with ICM text files in Connectivity Studio. If you need more information about our Business Integration Solutions, please get in touch. If you have any suggestions for improving our tutorials, please let us know, and we will be happy to incorporate them when we can.